A Look Back and A Little Something For You

A Look Back and A Little Something For You

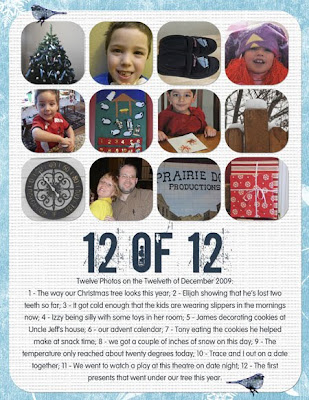
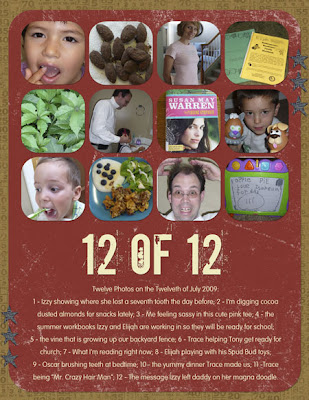
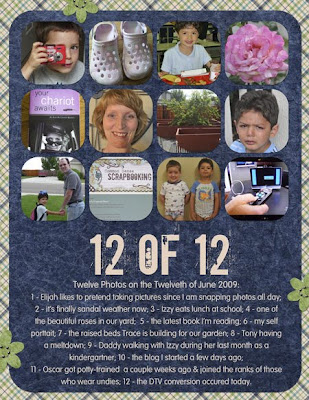
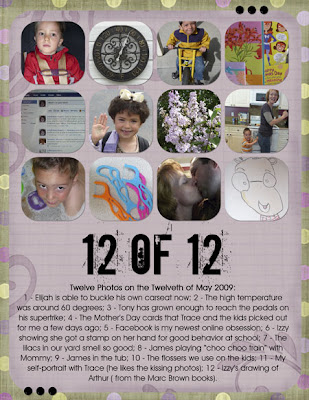
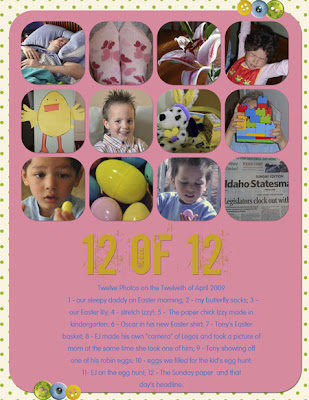
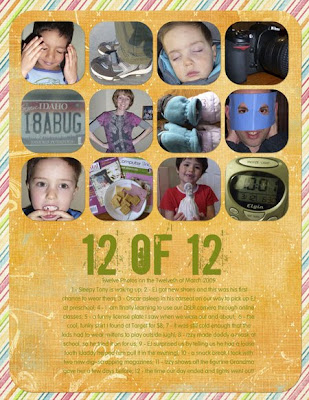
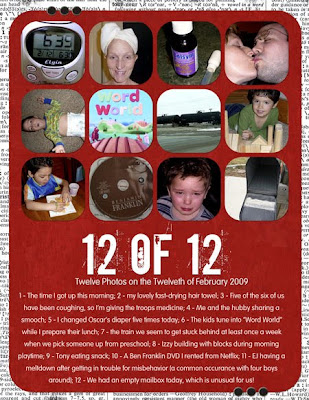
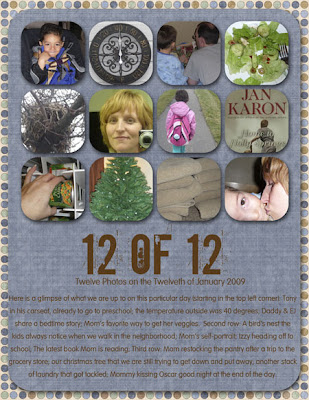
December has been a wonderful month around here, but also a busy one, so I haven't updated in awhile. I've been trying hard to spend time with my husband and kids. I'm back now and feeling so happy about my scrapping this year. I didn't accomplish everything I wanted to with it. I was really hoping to get a jump on the kid's life books, but I still have time and hope to start knocking some of those pages out in 2010. The good news is I completed the final "Twelve of Twelve" for 2009, and that has me feeling pretty stoked. I was looking back on all of them, and I'm so glad I have a snapshot of what we were doing each month. So, just because I think they are worth seeing again, here's a look at December's page, as well as the rest I've done this year:


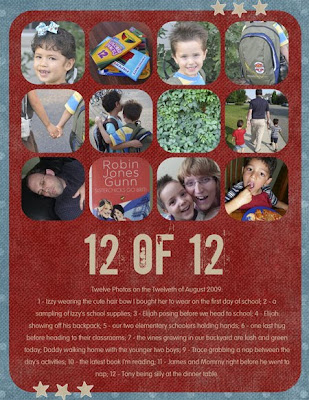
I've talked in depth about the "Twelve of Twelve" concept before, so I won't go into that much detail now. You can check out Susan Keuter's blog (since Twelve of Twelve is her concept), or you can read my previous post on the subject. I look back on it now that it's been a full year and can tell you that it was worth doing. It wasn't difficult, and as busy as I have been, I could definitely fit it in once a month.

I know a lot of folks are gearing up to start Project 365 (which entails taking a picture every day, then scrapping a week's worth of photos), so I thought I'd put in a plug for those of you who might even be slightly interested in Twelve of Twelve. Scrapping twelve photos once a month is much easier, in my humble opinion. There's no special supplies needed, just the ones you have already in your stash. This is a great opportunity to put some of those lovely papers and embellishments to work.

And, if you dug the idea of using a digital template, like I did this last year, I have some digital goodness for you below. I whipped together some layered templates that I'm pretty sure can be used in Photoshop and will for sure work in Photoshop Elements. I have made it so that everything is completely editable --- you can change the fonts, change any of the layers to your preference, or even delete the ones you don't need. I made them in 8.5 x 11 and 12 x 12 sizes, so that you can use the size you prefer.

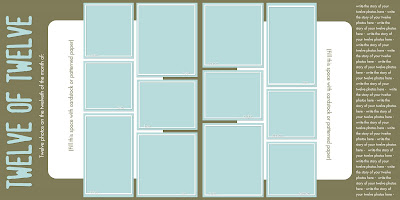
I kept the design of them simple, since Twelve of Twelve pages are supposed to come together quickly and be no fuss. If you want to add more, then feel free. I also decided to go with a two page format, simply because the photo spaces in the past year's template were a bit small and I couldn't show as much of my pictures as I wanted to.

You can see what the templates look like below. Even though these thumbnails show the two pages stitched together, there are actually separate page templates for the left and right sides of the layout. I did this because I think it's tons easier to get them ready for printing, and you can always make a larger background and plop the two pages on it if you feel like uploading them to the web as one document.


You can click here to get download the files. I tested this link out and it worked fine, so holler if it you have trouble with it at all.

And, just as you would with anyone else's work, please give me credit if you use the templates on pages to upload to a gallery or send off for publication.

Thanks, and I hope you enjoy this small holiday gift from me to you!

Do It Yourself Family Photo Shoot

Do It Yourself Family Photo Shoot


I love this time of year for several reasons. One of those reasons is receiving the photos and Christmas/Holiday greetings from my friends and family. I really like to respond in kind by creating a photo card with a picture of our little brood. Above is the one I did up last year using a card template by Holly Brook Jones over at Two Peas.

The difficult part comes when we go to take our family picture. The first year we had the kids, we did the smart thing and had a photographer take photos.

Honestly, though, the last couple of years have been very challenging, and booking a sitting with a photographer didn't happen. Time, money, and sheer exhaustion got in the way, so we chose to do it ourselves.

I don't think this way is the most optimal. I would always recommend having someone else take your pictures, but this can work in a pinch. And sometimes, around the holidays, we may need a quick, no-fuss method for getting things done.

Here are some tips that worked for us in our makeshift photo shoot:

1. Choose coordinating outfits for family members.
We always choose colors that go together well instead of trying to have everyone wear something that's identical. Last year, as you can see from the card above, everyone wore jean jackets with white tees underneath. The other two years, I've gone down to Old Navy and got everyone cute holiday shirts that had similar colors.

2. Do a practice run with some of the poses.
This worked especially well for us since we have young kids. Here is a picture of my hubby showing our youngest boy how he wanted him to pose:


3. Decide where you will take the pictures.
We have taken ours in or around our house because we are generally pressed for time. Outdoor photos are my preference, but this year, the weather didn't cooperate on the day we planned to take them. Instead, we used the place in our house with the best light. We chose our staircase because of the light, it kept the kids fairly contained and they couldn't get too rowdy. The previous year, we took them outside on our patio.

4. Use a tripod.
This idea is probably an obvious one, but it bears repeating.


My hubby set ours up and tweaked the camera settings so that it would take pictures automatically on continual burst (where the camera takes several pictures in a row until you tell it not to). This allowed him to hit the button on the camera, then run over really fast and jump in with the rest of us.

5. Take a lot of pictures!
If you have squirmy kids or family members that have trouble keeping eyes opened, tongues in mouths, and so on, a lot of pictures to choose from will save your bacon. Using digital cameras makes it easy to decide what pictures to keep or delete. It's perfectly OK to delete the ones you don't like or need.

And let me be perfectly honest here --- there were many, many shots that looked like this or some variation of it:


It makes me laugh now to look at it now, but at the time I was pretty frustrated. As we looked through the hot mess of crazy pictures, we did find some in the set that were good. Here is the one we chose for our holiday card:


6. Use photo editing software to hide any flaws in your picture.
My husband and I laugh when we see this picture, because our oldest son (in the light blue shirt) is leaning forward slightly. Trace says Elijah is doing his "on the potty" stance in this picture. If we had someone else take the picture, then they could've told Elijah to sit up straight, but that's how it goes. We did the best with the time we had. So instead, I will use Photoshop Elements and some cute digital goodies to hide our picture taking sins. I found a fun holiday card template made by Michelle Coleman to plop the photo into.

With a little photo editing magic and Michelle's template, here is the finished card:


The cute white paper strips, the red patterned paper on the left, and tinting the photo to a sephia tone all make the things that bugged me about this photo less noticeable (of course, now all of you will see my son doing that goofy sitting stance forever more). I'm actually quite happy with how this turned out, even if this wasn't our first choice for taking the photos. My husband and I agreed that even though our youngest has a cheesy grin, it's pretty cute and shows his personality at his age.

7. Once the group family pictures are done, take some of individual family members.
While you still have everyone there and dressed nice, take advantage of it and get some good shots of them. This is one of my favorite things about family picture taking time, because the kids really like the one on one picture taking. And, Trace and I also snapped pictures of each other, since we are always behind the camera. Here are some of my favorite individual photos:


I hope you find these ideas helpful. I don't claim to be an expert on the subject of photography or family pictures, but I do know how to make things works when I'm short on time and energy. :)

Enjoy taking your holiday pictures and enjoy the best of the season.

I'm Alive...

I'm Alive...

...and finally healthy! My hubby and I both got ill, so between that, all the Halloween festivities, and my husband's birthday, I had a lot going on. I'm back in business now and thought it was about time I did a page share:

Here are two pages I did last month for Heather T with her digital goodies she has available at Pixel Canvas.

This first one uses her "Masked 1" and "Country Dream" kits:


This second page was done primarily to showcase her "Paper Pieces 1: Houses" kit. I also grabbed some patterned paper from her "Burnished Papers" kit:


The next two pages are ones that I did when I participated in the Fall Crop at Two Peas (it was held at the beginning of October). Both of these were created for challenges I took part in, and the layout of Izzy and the dragonfly got me entered into a drawing, which I was lucky enough to win! I got a hefty box of uber-cool scrapping goodies for my efforts...woo hoo!


The following three layouts are ones I created as I took part in some of the Digital Weekly Challenges at 2Ps. I don't always have time to participate in these, but when I do, I feel like they help me grow as a scrapbooker. I enjoy the fact that I can hone my skills by the simple act of doing a page for a challenge.


This layout was a real catharsis for me. While the crux of the challenge for this page was to use a black and white color scheme with a color photo, it was great to actually address something through this page that has been bugging me for a long time. And ya'll know how much I like to be honest in my scrapping:


For this next layout, we were challenged to create a shadow for an object on our page, then warp it so that it actually looked like there was light somewhere casting a real shadow. I made a little shadow for my pumpkin and was quite happy with it:


The next challenge I did required creating a digital paper tear somewhere on my page. Can I just tell you how much I've always loved paper tearing? It's not really the "it" technique anymore, but I still try to sneak it into my pages here and there. I could've just grabbed one of the premade paper tears I already have in my stash, but I really wanted to try making my own. It took a bit of experimenting to find the right type of brush to use, but I finally got it right. I added a texture filter and burned the edges a bit, and I thought it turned out pretty darned good for my first ever shot at it:


Over at the 2Ps digi-board, some of the other gals and I finished another round of the digi-morph challenge, where we are sent a layout by another person in the rotation, and we scraplift the page to create our own. Throughout the process, we see only the page right before ours, and none others. When we all finish, then the challenge hosts reveal all the pages so we can see how the layouts have evolved. Here was my page for that challenge:


If you are interested in seeing the change from the first layout to the last, check out them here.

Now that I've reached the end of my post, I suppose you know what's coming! Here is October's Twelve of Twelve" page. Shhh...don't tell anyone I actually took the photos on the 13th, since the 12th was kind of an icky day...:D


Have a super day!

My Review: Picasa as a Digital Organization Tool

My Review: Picasa as a Digital Organization Tool

One of the most daunting tasks in scrapbooking is getting all the cool stuff organized. Ideally, we want to find what we need quickly and easily. I don't think I know any scrappers who love an exhaustive search through their supplies; that can take longer than the actually making the pages.

I've really enjoyed digital scrapbooking because it doesn't take up physical space or make a mess. However, as I have gone along, I've learned that finding those cute embellishments and papers on my computer can be a real drag if the supplies aren't organized well.

Even though I have a folder of digital kits on my computer, and the kits in sub-folders inside that, looking for something was still a bit of a wild goose chase. As a newbie digi-scrapper, I'd right click on the "start" menu, choose "explore," and go from there. Most of the time, an initial look at the thumbnails of my supplies was difficult. I knew this was definitely not what I wanted to do long term.

My thoughtful and computer savvy husband saw me struggling with all of this. He knew I needed a way to get my digi supplies organized, so he went nosing around the web. He found the Picasa website, downloaded the program for me, and showed me a few basics.

Picasa is primarily designed to organize photos and has a few photo editing capabilities on it. While I am doing a little organizing with my pictures in Picasa, my focus right now is on my digital kits. When you know how to use it, the program is wonderful for organizing all the digi goodies.

While I consider myself fairly competent on the computer, I didn't find using Picasa to be intuitive. Lucky for me, I found that Molly Schneider over at Jessica Sprague's site offers a class that teaches how to use the program. Molly's class has demystified Picasa, and now that I actually know what I'm doing, I've liked using it quite a bit.

Once you have configured the settings on Picasa so that it can "see" all of your digital files, then you are able to view all the supplies you have on your hard drive. You will even find some you didn't know were there or that might have been misplaced:


In the above example, you can see that I searched for the term "heart." This is a portion of the items that Picasa found for me --- both the items I tagged and the ones that have that term as a file name. Before using Picasa, I forgot I had some of the items, and wasn't using them because they were hard to locate.

One of the best features of the program is the ability to add tags. For those of you who are not familiar with that term, a "tag" is basically a descriptive caption that you apply to photo, digital element, etc. The idea behind tagging is when you add them to the items you wish to organize, it allows Picasa to find them again quickly and efficiently. So when you put a term, such as "brown" into Picasa's search engine, it locates the things with that file name, and anything you've tagged with that word. See below to view some digital elements that have been given tags:


Even though it's small, you can see the item I've circled has the tags of "beach," and "brown." It would be similar with any other tags that are applied to a photo or digital element. It reduces time spent searching significantly.

To tag a photo in Picasa, it simply requires a "Control T" once Picasa is open. Many times, the tagging window will already be open (provided you are running the latest version, which at this time is version 3.5).


In the above picture, take a look at the top portion of the window. You can see a space to enter the tag you want. At the bottom, there is a section of "quick tag" buttons (see where I've placed the arrow). Quick tags buttons are places you can add the tags you most commonly use. When you tell Picasa what you tags want to apply to these quick tag buttons, you no longer need to type in your favorite ones. You can just click the buttons instead. The top two buttons will show the last two tags you applied to items in the Picasa database.

So, what do I think of Picasa so far? Here's my list of pros and cons.

Pros:
1 - Picasa is free and won't cost you a cent.

2 - The program can be used on either a PC or a Mac.

3 - Tagging definitely rocks. I can scrap so much faster when I'm looking for a specific element, paper, or color. Searching is a piece of cake now.

4 - It's nice having the tagging window open along side the view of the items I have showing. It makes searching and tagging really easy.

5 - Picasa allows you to mark certain photos with stars so you can find them later. You can also force the program to search for photos by looking for faces. If you click on the link I provided above for Picasa, it will explain how version 3.5 can be set up to apply name tags to photos as they are being downloaded from your camera.

6 - If you use Blogger, it has a feature which allows you to quickly and easily upload pictures from Picasa to your blog. I believe there is similar functionality if you want to upload to Facebook.

7 - There are other cool features that Picasa has to offer. I'm still learning what they are and how to use them. Honestly, there are too many to cover here. I'm excited to learn them and discover how they will speed up my photo and kit organization.

Cons:
1 - Sometimes when I'm applying a tag to an item, I might misspell it. Let's say I'm trying to type the name of the color "brown," but instead I accidentally put it in as "borwn." Unfortunately, my typo stays in the saved list of tags. I can delete it off of an item if the tag is wrong, but it still comes up if I incorrectly type it again. I find that a little annoying.

2 - Since Picasa is part of Google, the main place to get help is over at the Picasa message boards. That is OK for a short reference, but I find it difficult to
get help from Goggle staff. Maybe that's just because I don't know my way around yet. Thankfully, I haven't had any issues where I needed much help with the program.

3 - Tagging can take a long time if you didn't organize them as you go, but it isn't impossible. It can be done while you are watching TV, or even if you have just 15 minutes somewhere.

My overall verdict? Even with its drawbacks (which I still think are quite minimal), I think Picasa is a great program for organization. I have been happy with it by and large, and highly recommend it. Since the program is free, it would be easy to try out. And, if it turned out that Picasa isn't someone's cup of tea, they could move on to another program.

I've found the program to be a helpful tool and wanted to pass on what I've learned so far.

Thanks again for visiting...:)

Look at My Boy....

Look at My Boy....


...isn't he cute (yes, I know I'm biased)? It's so hard for me to believe that he was ever this little!! I love this page. This was his first ice cream cone ever, and he didn't know what the heck we had in front of him. He certainly wasn't sure if he wanted to eat it. Once he figured out it tasted good, though, there was no holding him back. It's amazing how fast he's grown. I'm so glad we took these pictures. I forget how his little face looked, and what things he was learning, and these photos are bringing it all back. It's so nice to look at these and relive those moments.

If you have time this weekend, I'd encourage you to find some photos you love and scrap them. This is why we all scrapbook, right? To look back in time and remember why we took our photos in the first place.

Another reason I created this page was to help out one of my scrapping pals, Sam Barrett. She created a digital overlay grid and asked some of her friends to try it out and see how we liked it. I generally use templates, so I sort of created a template that more or less fit into her grid so she could see how others might make a layout with it. Thanks a bunch, Sam, for letting me try it out.

If you like Sam's overlay grid, here is the post on her blog about it.

Enjoy your day...:)

I'm Baaaack...

I'm Baaaack...

Sorry for the hiatus. I hate it when life gets in the way of blogging (just kidding). I took some time out to celebrate my birthday, take a Labor Day weekend trip with the fam, and get my younger two in preschool. It's been a little crazy!

Here the pages I've done recently:

The following two are layouts I made using Heather T's "Tuesday Templates" kits that were released on 8/25 and 9/08:


The next two projects were created with Heather's "Burnished Papers" kit. As you can see, the paper is beautiful works well for both digital and hybrid projects (like the card). When I had my birthday party a few weeks ago, I did up a card kit for each of the gals that came and then they completed it that night. It turned out so pretty!!


Another page I did for Heather was made with her "Ooh, Shiny 1" embellisment kit. There are tons of pretty pearls and gems to work with.


This next page came together for two reasons. First, I've decided to quit putting myself on the bottom of the list behind family, church responsibilities, and all the other stuff that I have to do everyday. Putting my feelings into a scrapbook page about it seemed like a good way to remind myself not to shove "me time" down again. Second, it was a fun page to enter in last week's digital challenge over at 2 Peas, where participants were challenged to use exclusively the free digital kits available there. So cool!


And as always, here is my latest "12 of 12" page. I think this is the first one that fell on a saturday, so we didn't have the hurried schedule we have all the other days of the week. Plus, my hubby and I went to Art in the Park, so we got some fun pictures there:


Thanks for taking time from your busy day to come by!

Simple School Albums

Simple School Albums

This time of year is so busy. The children are heading back to school, and those of us who are taking care of them anticipate the workload that will come with that. Getting everyone to and from school each day, making sure they have a decent lunch, keeping their extracurricular activities organized, and ensuring that they are caught up with homework is already adding a lot to our plates.

There is also the pressure document their experiences throughout the school year, take pictures, and hold onto their memorabilia. As a scrapbooker, I want my kids to have more mementos from their school years than I did. However, I'm not up for trying to be "supermom" in this area. I would like to find a balance between creating cute albums for them and still having time for other interests I have, too.

I'm also one who gets overwhelmed with clutter, and while I haven't gotten a handle on going through it all efficiently, I'm not just going to let it accumulate.

Here are a few guidelines I've set up for myself. I find that these keep me sane and prevent me from taking all of it and hucking it out the front door:

1 - I'm not going to keep everything. Since there's more than one kid in this household, we'd be up to our ears in paper if I did. My spouse and I pick and choose what we think is the best, the cutest, shows their growth, or is especially memorable. The rest gets put in with our regular recycling.

2 - The kids can keep one or two bulky projects (such as a volcano created out of papier mache, etc.) they created for school, as long as it fits in their rooms. We will take photos of all of them, created scrapbook pages for them, and then the remaining items will have to go.

3 - We will keep things as easy as we can on the first and last days of school. That means we will rise a little earlier to take photos before school. We will take a few photos when we drop them off (since we walk and they don't take the bus), but we won't drive ourselves crazy.

I'm going to focus today on what things I'm putting in my kid's albums, and in another entry I'll show you how I compile the contents of them.

Great albums always start with nice photos, so a couple of weeks before school starts, I try to list what I want pictures of. That generally includes firsts (such as the first day, the first school lunch, first set of supplies, etc.), the walk to school, a picture of the child near or inside the classroom, and any new clothes or backpacks.

Wherever possible, I take pictures before the first day. The less we have to do on that day, the better. Since my hubby had purchased all of Izzy's school supplies early, I piled them on the table, had her sit by them, and snapped a couple of shots. Boom. One less thing to do and one of her "firsts" is already recorded:


Then, when that busy day finally hits, I try to schedule with my hubby so he can take part of the day off. We both keep a camera handy, that way it's not on one person to take all the pictures AND make sure everyone is ready and cleaned up. It reduces a lot of stress. By doing this, we ensure that we get the adorable and important pictures we want for their scrapbooks:


Here's more on my opinion on children's schoolwork and how much of it to keep. There are some people out there who like to keep everything their kid brings home, and for them, that's great. That just doesn't work for me. So, what I do is to go through all of our kid's papers with my husband. We do this once or twice a week. Some weeks, we may not save anything, and some we save a lot. If the child has done multiple versions of the same drawing/or worksheet, we keep only one. We label their work with the child's name, along with the month and year the worksheet or artwork was done. We keep a manila folder for each child, and their papers or photos of projects go in there.

At the end of each school year, I go through their files, pick a few things to slip into a sheet protector, and place those in their albums. These I will intersperse with layouts I've done and their various school pictures. There are some things that I think are really cute, so I scan and save them in a format I can use in Photoshop Elements. From there, I can incorporate them into a layout. I made the following page at the beginning of Izzy's first grade year because it was just so fun. I scanned one of the first worksheets she brought home and used it to chronicle her growth as a student.


That still leaves a fair amount of items in their folders, so when the folders get full, we are planning on starting a box for each child to hold the rest of their work. Those boxes will stay in the garage and we'll eventually give that to them when they are grown.

For me and my crew, this had made things pretty manageable and kept things fun without overwhelming us all. I have also decided not to give into the guilt that some try to place on me about not saving *every* single scrap they bring home. I think in the long run, my kids would rather see that I kept their "greatest hits" instead of loading them down with boxes and boxes of schoolwork.

If you like the kits I used for my pages, here are the links:

The first two layouts, I used Heather T's Yay, School! kit.

For the third page, I used Katie Pertiet's School Days kit.

Thanks for taking time to visit and have a great day!

Time For Another Page Share

Time For Another Page Share

OK, last week was crazy busy since it was the first week of school for my two oldest kids, so here I finally am with an update.

Here's what I've been working on lately:

These pages I did for Heather T using here "Brad Me 1" and "Softer Side" kits, both available at Pixel Canvas:


Here are layouts I did for Heather over at Gotta Pixel using her "Gotta Grab It" kits from both July and August:


The following layout is one I did for the very cool Digital Morph challenge over at 2Peas. One layout was chosen as the starting point, then the first player scraplifted parts of the design and added their own spin to it. From there, it was emailed to the next person in the group, who saw only the new page that was done, and the process was repeated, until we were finished. None of us saw all of the layouts or the progression that occurred with each page until the very end. It was so fun! When it was my turn, I chose to do a page about Izzy eating her first lunch at school:


And last, but certainly not least, Here is August's 12 of 12 page. The first day of school conveniently fell on the twelveth, so this one is particularly fun for me:


I appreciate you stopping by --- Have a beautiful day!