Showing posts with label cards. Show all posts

Celebrating 100+ subscribers on my YouTube Channel (With Freebies)!


Hey guys!  I've been working on this post for a few months now.  I've been so excited to see the number of subscribers slowly but surely growing, and I wanted to do something to say thank you.  I know a lot of people like to celebrate when they reach 1K, or even 100K, but I feel like kicking up my heels now, since my subscriber list is a bit over 100.  I think small victories should be celebrated as well as the larger ones, and it's no small thing to me that this many of you follow me now.

I was so freaking scared when I made my first video.  I had to start over about ten times, I waited a 5 months or so before I decided to edit and publish it, and mustering up the courage to actually hit the publish button on my YouTube channel took a lot.

Those of you who've taken time to contact me, leave comments, and follow me here and on social media have really made my day and brightened so many moments in the past year or so.  Thanks for the encouragement and taking time to watch my content.

As a small token of my thanks, please enjoy these downloadable files.  I hope you find them useful  and like them.  Please give me a holler if you use them in any of your projects.


Bullet Journal Pages

Blank calendar grid: https://www.dropbox.com/s/f27e59r141bux6a/Bujo%20Calendar.jpg?dl=0


Gratitude Log: https://www.dropbox.com/s/vo7r4ckid7drceo/Gratitude%20Log%202.jpg?dl=0


Doodles, word art, and shape stickers (one one sheet): https://www.dropbox.com/sh/lzxtjuyfsiwt9mn/AABbzY4vbinMcKl8ua75f4W5a?dl=0

Zip File of individual stickers, doodles, and word art (same as what you see above, but each image is its own individual file): https://www.dropbox.com/s/i7v4os693ux9hls/individual%20journal%20stickers.zip?dl=0

PDF files of all bullet journal pages listed above: https://www.dropbox.com/s/7b97d4ddetojlqg/PDF%20Pages.zip?dl=0


Scrapbooking Layout Templates


1 - 8.5 x 11 in. template & 1 - 12 x 12 in. template (these are layered .psd files): https://www.dropbox.com/s/ziw2nto6qev8x4n/Hundred%20sub%20templates.zip?dl=0


Layered Card Templates 


Card front templates (meaning, you use the templates to create the front of the card that you later adhere to a piece of cardstock.  Although not visible here, there is a small white border around the edge of the cards.  These are also layered .psd files), one landscape and one portrait: https://www.dropbox.com/s/yrwfv7txsritkx6/Hundred%20subscribers%20card%20fronts.zip?dl=0


Thanks a bunch for visiting here today!  See you next time..:)


Digi Paper Trend - Tropical


 Do you ever miss the many different scrapbooking magazines that used to be available?  I used to see them so frequently, not only in the local scrapbooking store (aka LSS), but in pretty much every grocery store I frequented, bookstores, gas stations, and more.  Nowadays, it's harder to find them...thankfully, there's still Scrapbook & Cards Today.  I'm grateful for it, and love to read it, but I still get sad that there's only scrapbooking publication left.   Back in the day, when there were plenty to choose from,  I felt like the magazines were the best source for spotting papercrafting trends.

I know there's a ton of inspiration online, but just trying to find info on the current year's trends is a bit hard.  It feels like most posts or online articles about what's trending are focused on one brand, and I think that it's nice to be able to look across all the offerings available.  There was one blog I used to visit that had a series on trends, but they stopped posting about that about 2 years ago.

So, after doing my own research on this year's trends both in print and online,  I decided to do videos and blog featuring a current trend.   Here is my first video in this series, which showcases the "tropical" trend:


I created a Pinterest board for things I found that show the popularity of Tropical Chic, which does have scrapbooking layouts and cards, but also food ideas, home decor, jewelry, party favors, and more.  If you have any doubts as to how well-liked this trend is, the objects I've gathered here should put them to rest:

Pinterest board - Tropical


Since trends are seen across multiple areas, it's no surprise that it's also popped up into paper crafting.  I was easily able to find tropical- themed digital scrapbooking kits.  The one I chose to use for the projects I'm showing you today were made with the "Pineapple of My Eye" digital kit by Traci Reed and Jady Day Studio at Sweet Shoppe Designs:

Get The Pineapple of My Eye Kit Here


The first project I'm sharing here is my digital bullet journaling spread.  I imported a jpeg image of a single pineapple as well as a white ribbon with little pineapples on it.  I used the ribbon as a border and placed a little pineapple next to each day of the week.  From there, I just used my Apple pencil to doodle in the Morpholio Journal App and added the writing for each section of the spread.


,


Up next is this scrapbook page I made about a pool day we had during our DisneyWorld vacation.   The pool was at the Music Resort, and while it did have pools shaped like musical instruments,  the main feel was more tropical, so this kit was perfect. 


I couldn't resist using the kit to make a card...this pineapple element was calling to me, so here you go:


Here's the list of traditional supplies I used for this card.  If I couldn't find a link to a particular product, then I provided a link to one that's similar:

Pink Bazzill Cardstock
Recollections colored rhinestones
silk flower embellishments
raffia
a button from my stash.  You can use anything you have on hand...I fully encourage using your stash whenever you can.


I hope you guys enjoyed my take on the tropical trend...if you feel so inclined, go and try it out for yourself!

See you all later,


Last Minute Graduation Cards


Well, as you can guess from the title of this post, I needed some cards for a couple of graduates, realized that my stock of pre-made cards were gone, and so I scrambled to get some done before we had to give them out.

The nice thing about these cards is that you can customize the color (in most cases) to match the color of your graduate's school or university.  I used the Leaving the Nest: Graduation kit by Traci Reed.  Click here to get the kit:


As for the physical supplies used in the cards, the links are below.  If I don't have a link for the actual product or a substitution, I'll also make a note of that: 


double loop picot trim (this is a close substitution)
Brown Gingham Ribbon (a substitution)
Rusty Hinge Distress Ink (used in the video, but not pictured)
Glue Dots Dispenser  (not shown in the picture, but used in the video)
Also, use the adhesive of your choice if you want something else in addition to the Glue Dots

Here's the video showing how to make the cards: 


Let me know if you make cards based off of the ones in my video, and feel free to comment with future post or video ideas, suggestions, or constructive feedback.  Thanks again for spending part of your day here.  Have a good one!


Video: Set of Four EASY Halloween Cards

Halloween is almost here, and I wanted to make a fun hybrid project in honor of the day.  Rather than focusing on treat bags or decorations, I prefer to make cards!!


I personally think that Halloween cards should be as popular as Christmas or Birthday cards...there's so many cool and silly ways you can use the theme of Halloween to create an adorable card to send to a friend.  

To make my cards, I used two kits from a collaboration done by Sahlin Studio and Britt-ish Designs who both create designs for the Lilypad: 


I divided this tutorial up into 2 videos, since I thought watching one very long one might get tiring.

 Here is part one: 


Also, here are the other digital supplies I used (or close substitutes) on these cards if you are curious or want to pick them up yourself:

Bebas Neue Font

Digital Distressing kit by Nancie Rowe Janitz

The Part Two video:


 Traditional scrapbooking supplies used (all are clickable links):

Hero Arts Yellow Gemstones
Recollections Adhesive Rhinestones - Black
The Paper Studio Le Petites Mini Paper Bows
3/8 in. Orange Gingham Ribbon
Queen & Co. Rhinestones in Snowflake
American Crafts White Cardstock
Aleene's Original Tacky Glue
Mini Jute String
Gelly Roll Pens in Black and Purple
Mini Glue Dots
Ranger Distress Ink in Seedless Preserves
Ranger Archival Ink in Black
Epson Matte Presentation Paper


Here is a close up look at the finished cards if you want to get a closer look:


Have a splendid day!!

Long Time, No Blogging...

...sorry about that guys, but um, I have really good reasons why I was gone for so long. Here they are:

-Three sinus infections
-Two ear Infections
-Two cases of Pink Eye
-Doctor's appointments and filling prescriptions
-A crazy dosing schedule for all the antibiotics

All this was followed by:
-Three cases of 24-hour flu
-Lots of laundry
-easing three little sick bellies back onto normal eating
-Lots of disinfecting

The only one in my household who completely escaped all of this was my oldest child, and the rest of us got socked with at least some of the above...ack!

OK, so now that my family has come through all of that, I finally have a couple of seconds to breathe and actually get some scrapping done!

The last month and-a-half hasn't been all bad. I have had the fun opportunity to work on the creative team for Kerry Stewart. I've admired Kerry's skills as a digital scrapper for well over a year now, and she has also started designing digital kits for Two Peas. You can see her cool line of products here.

Here are some pages and a card I've done recently using her kits:


And, something really cool that's happened is that a couple of these pages (Mother's Day and Supa Star) have been featured in the Digital Scrapbooking Newsletter at Two Peas recently.  It's nice to know that my pages are getting a little bit of notice...woo hoo!

Thanks again for taking a peek.  I promise I'll be back posting much sooner than the last time!

Do It Yourself Family Photo Shoot


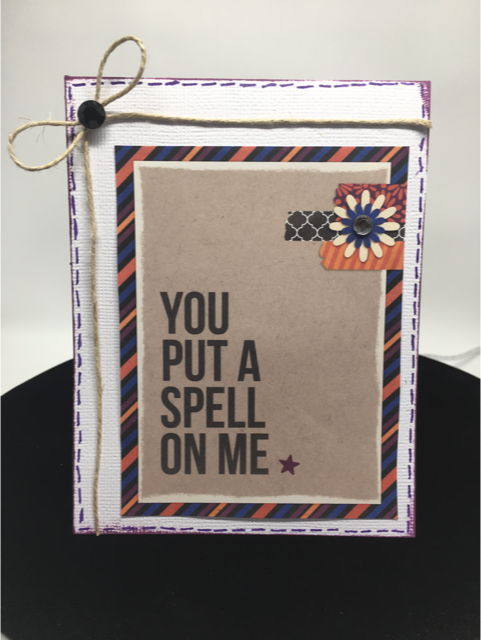
I love this time of year for several reasons. One of those reasons is receiving the photos and Christmas/Holiday greetings from my friends and family. I really like to respond in kind by creating a photo card with a picture of our little brood. Above is the one I did up last year using a card template by Holly Brook Jones over at Two Peas.

The difficult part comes when we go to take our family picture. The first year we had the kids, we did the smart thing and had a photographer take photos.

Honestly, though, the last couple of years have been very challenging, and booking a sitting with a photographer didn't happen. Time, money, and sheer exhaustion got in the way, so we chose to do it ourselves.

I don't think this way is the most optimal. I would always recommend having someone else take your pictures, but this can work in a pinch. And sometimes, around the holidays, we may need a quick, no-fuss method for getting things done.

Here are some tips that worked for us in our makeshift photo shoot:

1. Choose coordinating outfits for family members.
We always choose colors that go together well instead of trying to have everyone wear something that's identical. Last year, as you can see from the card above, everyone wore jean jackets with white tees underneath. The other two years, I've gone down to Old Navy and got everyone cute holiday shirts that had similar colors.

2. Do a practice run with some of the poses.
This worked especially well for us since we have young kids. Here is a picture of my hubby showing our youngest boy how he wanted him to pose:


3. Decide where you will take the pictures.
We have taken ours in or around our house because we are generally pressed for time. Outdoor photos are my preference, but this year, the weather didn't cooperate on the day we planned to take them. Instead, we used the place in our house with the best light. We chose our staircase because of the light, it kept the kids fairly contained and they couldn't get too rowdy. The previous year, we took them outside on our patio.

4. Use a tripod.
This idea is probably an obvious one, but it bears repeating.


My hubby set ours up and tweaked the camera settings so that it would take pictures automatically on continual burst (where the camera takes several pictures in a row until you tell it not to). This allowed him to hit the button on the camera, then run over really fast and jump in with the rest of us.

5. Take a lot of pictures!
If you have squirmy kids or family members that have trouble keeping eyes opened, tongues in mouths, and so on, a lot of pictures to choose from will save your bacon. Using digital cameras makes it easy to decide what pictures to keep or delete. It's perfectly OK to delete the ones you don't like or need.

And let me be perfectly honest here --- there were many, many shots that looked like this or some variation of it:


It makes me laugh now to look at it now, but at the time I was pretty frustrated. As we looked through the hot mess of crazy pictures, we did find some in the set that were good. Here is the one we chose for our holiday card:


6. Use photo editing software to hide any flaws in your picture.
My husband and I laugh when we see this picture, because our oldest son (in the light blue shirt) is leaning forward slightly. Trace says Elijah is doing his "on the potty" stance in this picture. If we had someone else take the picture, then they could've told Elijah to sit up straight, but that's how it goes. We did the best with the time we had. So instead, I will use Photoshop Elements and some cute digital goodies to hide our picture taking sins. I found a fun holiday card template made by Michelle Coleman to plop the photo into.

With a little photo editing magic and Michelle's template, here is the finished card:


The cute white paper strips, the red patterned paper on the left, and tinting the photo to a sephia tone all make the things that bugged me about this photo less noticeable (of course, now all of you will see my son doing that goofy sitting stance forever more). I'm actually quite happy with how this turned out, even if this wasn't our first choice for taking the photos. My husband and I agreed that even though our youngest has a cheesy grin, it's pretty cute and shows his personality at his age.

7. Once the group family pictures are done, take some of individual family members.
While you still have everyone there and dressed nice, take advantage of it and get some good shots of them. This is one of my favorite things about family picture taking time, because the kids really like the one on one picture taking. And, Trace and I also snapped pictures of each other, since we are always behind the camera. Here are some of my favorite individual photos:


I hope you find these ideas helpful. I don't claim to be an expert on the subject of photography or family pictures, but I do know how to make things works when I'm short on time and energy. :)

Enjoy taking your holiday pictures and enjoy the best of the season.

I'm Baaaack...

Sorry for the hiatus. I hate it when life gets in the way of blogging (just kidding). I took some time out to celebrate my birthday, take a Labor Day weekend trip with the fam, and get my younger two in preschool. It's been a little crazy!

Here the pages I've done recently:

The following two are layouts I made using Heather T's "Tuesday Templates" kits that were released on 8/25 and 9/08:


The next two projects were created with Heather's "Burnished Papers" kit. As you can see, the paper is beautiful works well for both digital and hybrid projects (like the card). When I had my birthday party a few weeks ago, I did up a card kit for each of the gals that came and then they completed it that night. It turned out so pretty!!


Another page I did for Heather was made with her "Ooh, Shiny 1" embellisment kit. There are tons of pretty pearls and gems to work with.


This next page came together for two reasons. First, I've decided to quit putting myself on the bottom of the list behind family, church responsibilities, and all the other stuff that I have to do everyday. Putting my feelings into a scrapbook page about it seemed like a good way to remind myself not to shove "me time" down again. Second, it was a fun page to enter in last week's digital challenge over at 2 Peas, where participants were challenged to use exclusively the free digital kits available there. So cool!


And as always, here is my latest "12 of 12" page. I think this is the first one that fell on a saturday, so we didn't have the hurried schedule we have all the other days of the week. Plus, my hubby and I went to Art in the Park, so we got some fun pictures there:


Thanks for taking time from your busy day to come by!