Here is a page I made about Izzy. I was just so thrilled with it that I wanted to share it and tell how I created it:
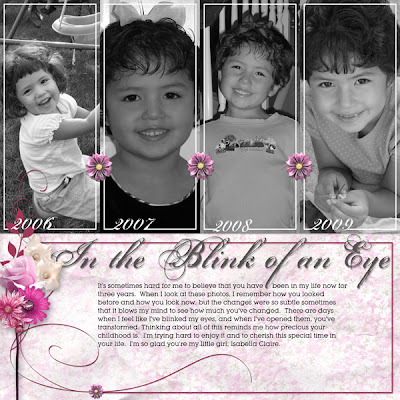
I've had the idea in my head for awhile --- the concept of a page showing the changes that Izzy has gone through the last few years. I wasn't sure how I was going translate the concept from a mere idea to a page. With the demands of my busy days and a gaggle of children, I rely a lot on tools that save me time and frustration.
Digital templates are one such tool. They are simple to use and so helpful when you need to speed up your scrapping. When I'm needing to get a page done quick, a template is my go-to solution. The very best part of using templates is that they are great for both traditional and digital scrapbookers.
The page I did of Izzy (shown above) is an example of how to whip up a quick digital page. I chose to work with one of Heather T's
Tuesday Templates because I thought the four slots for pictures would work well to show the progression of time. It took me about 15 minutes to choose pictures and mask them (i.e. force them to conform to) the photo slots on the page. I did a bit of manipulation with the elements on the template; I moved some stuff around, added extra copies of the flower jewels, placed borders in a few places, and added a title and some journaling. While I am not the fastest scrapper, I managed to get this layout done during my children's naptime. It was great to complete a page with just a short window of time...and it turned out so pretty (well, at least I think it is...;D).
Here is a link to a great
tutorial on how to use a template in PhotoShop/Photoshop Elements, which was put together by Jessica Sprague (please note that she created this video for Creating Keepsakes; I just linked it here rather than from the CK site for convenience). It really doesn't take a lot of time to learn your way around a template and make it work for you.
Now, since I was a paper scrapper for years before taking the plunge into digital, I've been wanting to try out a template on a traditional page. Just yesterday, I decided to see if I could crank out a hybrid page around one of my crazy days (and yesterday was plenty crazy...I think my youngest had about 6 or 7 tantrums). Besides the template, I pledged also to use only paper and supplies I had in my rather large scrapping stash.
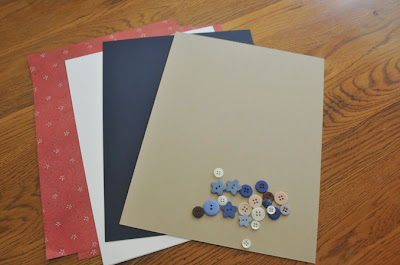
In the photo below, you can see that I chose a typical Independence Day palette of red, white, and blue, with a piece of kraft cardstock thrown in. I also picked out a Provo Craft paper I think I've had in my supplies now for about 8 years. It's called "Warm and Wooly," and I still love it even though it's no longer a trendy item. It has a little white dashes in a circular shape that I think are supposed to mimic snowflakes, but I thought they could also pass as little exploding fireworks. I also quickly grabbed a few buttons that I thought would match.
What I did next was create a custom template in Photoshop Elements (PSE) to plop my photos into. My template will work exactly like the one in the previous tutorial. It is tons easier than trying to manually crop my photos with a paper trimmer --- blech! This is an idea that I snagged from Cathy Zielske. Here is
Cathy's video tutorial on how to create your own template in PSE (again, I'm skipping the link to Ali Edwards' blog and just linking to the video itself --- I would suggest fast forwarding about 40 seconds to get right to the tutorial).
Once I create my grid, it takes about 10 minutes to select photos, mask them into each space in the template, touch up and resize them to fit the squares. I created the title with digital elements (blue paper, red scallop, and chipboard letters and numbers). I left one square blank so I could adhere some of that cute "Warm and Wooly" paper. From there, I print out my this grouping of pictures onto photo paper. I then cut out the grid, making sure I have an even margin around the outside. I mounted this large block of photos onto the kraft cardstock, and then the navy blue.
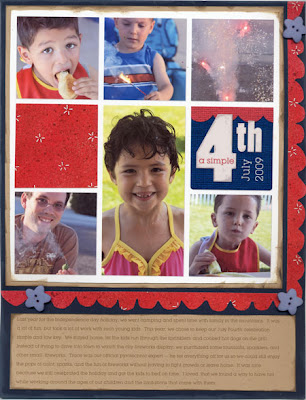
I then typed up my journaling block seperately in PSE, and printed it onto a scrap of the kraft paper. Then, the red scallops were placed(they were cut from the patterned paper), and added the buttons. I had regular tan buttons on there at first, but then saw the stars and decided they fit in better with the theme of the page. Not too shabby, eh?
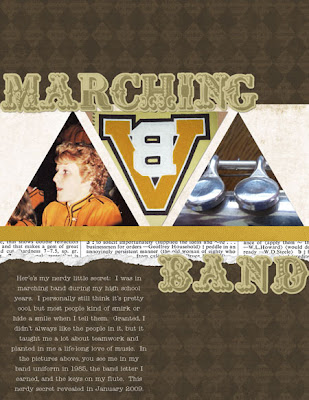
The cool thing about making your own templates for photos is that you are not just limited to squares or rectangles. You can do any combination of shapes you want using the shape tool in PSE. The software allows you to create circles, triangles, or any number of polygons. All of those shapes can be used as masks. Just to illustrate, here's a page I did using triangles:
So here is my verdict on creating a hybrid page: it did take longer for me than when I do one strictly digital. That may have been just because I haven't done a page that combines both in awhile. Part of the extra time was spent in fixing things that were crooked, gluing elements, and making sure all my traditional supplies fit correctly. I can't really do too much resizing with real paper and embellishments. Honestly, though, doing it hybrid is still faster for me than doing it strictly traditional because resizing the pictures and putting them into a template saves lots of time!
Most of my time on this project was spent arranging elements and ruling the ones out that I decided not to use. This is where I am particularly slow, but it's OK. I still got it done in just part of a day; I worked on it in the late afternoon/early evening in between interruptions and the everyday stuff I had to get done. The layout was finished shortly after dinnertime.
I don't know how often I'll do hybrid pages at this point, but I enjoyed it so much that I can't wait to do more of them once my kids become less dependent on me.
So anyways, I hope you enjoyed seeing me go through the motions on both types of pages. If you are not a template user, I encourage you to try them out! Jessica Sprague teaches great classes on how to use Photoshop/PSE and you can easily learn some basic skills there even if you aren't interested in switching completely to digtal pages. Additionally, Sande Krieger offers free digital tutorials over on the Two Peas digital board. Both are worth checking out (the links to these sites are found in my sidebar).
Thanks for stopping by and have a great day!


